A progress bar is used to determine how much progress have been made, this is usually done with JavaScript and it would be dynamic, however, we can also create a progress bar using Html and Css only that the progress would be static. So to create a progress bar using HTML and CSS, we can follow the steps explained below.
1. Create the HTML structure:
Create the HTML structure for the progress bar using a container; in this case, we would be using a <div> element as the container.
Html

<div class="progress-bar"><div class="progressMade"></div></div>
In this example, the progress bar is represented by the .progress-bar class, and the actual progress is represented by the .progressMade class.
2. The next step is to add CSS styles for the progress bar:
Apply CSS styles to define the appearance and behavior of the progress bar.
CSS

.progress-bar {
  width: 100%;
  height: 20px;
  background-color: #f1f1f1;
  border-radius: 5px;
  border: 1px solid orangered;
  overflow: hidden;
}
.progressMade {
  width: 0%;
  height: 100%;
  background-color: #4caf50;
  transition: width 0.5s ease-in-out;
}

.btn {
  color: orangered;
  background-color: black;
  font-weight: 700;
  display: block;
  margin-top: 10px;
  padding: 5px;
  border-radius: 5px;
  outline: none;
  border: none;
}
The .progress-bar class sets the width, height, background color, and border radius of the progress bar container.
It also hides any overflow within the container using overflow: hidden.
The .progressMade class defines the initial width and height of the progress bar, its background color, and the transition effect for smooth animation. The width is initially set to 0% and can be adjusted using JavaScript or dynamically using CSS to show the progress.
3. Adjust the progress dynamically:
To update the progress dynamically, you can use JavaScript or modify the width of the .progressMade class using CSS.
JavaScript

var progressBar = document.querySelector('.progressMade');
// first we are selecting the progress bar container using the class name
const btn = document.querySelector('.btn');
// next we select the button using the btn class name


value = 0;
btn.addEventListener('click', function () {
// here, we added a click event to the button, so that when the button is clicked, it will trigger the event.
  progressBar.style.width = value + 20 + 'px';
  value += 20;
  //this increases the current value by 20 and when next the button is clicked, the progress bar is incresed accordingly
});
In this JavaScript code, the progressBar variable is used to target the progress element within the HTML.
The updateProgress() function which was added directly in the event listener takes no parameter. This is because we initialize a “value” variable outside the function body.
The reason why we initialize the value variable outside the function body is to update the value anytime the button is clicked.
We can clearly see that after the progressBar.style.width is set, we simply want to increase the value by 20 and this increases the progress bar accordingly.
You can call the updateProgress() function with the desired progress value (in any measurement value like percent, pixel etc) to update the progress dynamically.
Result on browser

You can also learn how to create a modal or tooltip using html and Css
We can even make this even more interesting by adding more JavaScript and a little bit of Html code.
Let’s reformat our code a little bit.
New Html

 <div class="progress-bar"><div class="progressMade"></div></div>
    <h2 class="progressValue"></h2>
 <button class="btn">Update</button>

New JavaScript

var progressBar = document.querySelector('.progressMade');
// Update the progress (e.g., on button click)
const btn = document.querySelector('.btn');
const progressValue = document.querySelector('.progressValue');

value = 0;

btn.addEventListener('click', function () {
  progressBar.style.width = value + 20 + '%';
  value += 20;
  if (value == 120) {
    value = 0;
    progressBar.style.width = value + '%';
  }
  progressValue.innerHTML = `${value} %`;
  //this increases the current value by 20 and when next the button is clicked, the progress bar is incresed accordingly
});
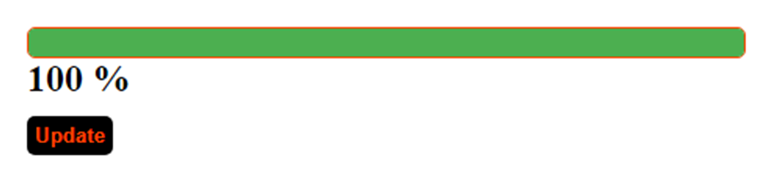
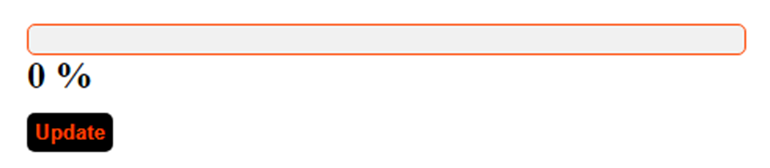
The most notable change is the value of the progress bar been shown
Also the progress bar returning back to 0 once it’s above 100.

Although we added much JavaScript, but by following these steps, you can create a basic progress bar using HTML and CSS. Customize the CSS styles as needed to match your desired design
Don’t forget you can also learn how to create a modal or tooltip using html and Css