Adding a CSS class to an element dynamically using JavaScript Classlist gives you the freedom to apply certain styles to any element without necessarily performing any further changes in JavaScript. The JavaScript Classlist can be used with different methods, these includes, Add, Remove, contains, toggle. You can check the add attribute here.
So in this article, we are going to learn how contains method, remove method and also the toggle method of JavaScript classlist works and how they can be used in projects.
One thing i want you to know is that, JavaScript Classlist is used to either check, add, remove or toggle CSS class
Javascript Classlist: Remove
Let us take this as our html
<div>
    <h1 class="heading1 div-child">Hello i am learning something new</h1>
    <p>i am a lorem ipsum paragraph text</p>
    <button>Submit</button>
    <a href="www.techknowmore.com">Learn more</a>
</div>
So, at the moment, if you inspect your document using your browser development tool, this is what you will see, just as we have in html.
My aim is to remove the “div-child” class from the selected element and i want to do that using the Remove “method”

So if we want to use the remove method on the heading h1 tag, we can simply go like this;
document.querySelector(".heading1").classList.remove("div-child")
or
const heading = document.querySelector(".heading1")
heading.classList.remove("div-child")
When you inspect the div tag again, this is what you should see;

Notice, the div-child class has been removed from the h1 tag
This is just the simplest way to work with the remove method when using JavaScript classlist.remove method
Javascript Classlist: Contains
The classlist.contains method helps us to check if a particular element contains a specific class. Once you check if the element contains the class or not, what you can do is endless. The best way to explain this is to use a button as an example.
Example
<button class="btn">click</button>And next, we just want to create a class in css with some styles
.btn-new {
  padding: 15px;
  width: fit-content;
  color: white;
  font-weight: 900;
  background: green;
  text-transform: uppercase;
  border: 5px solid orange;
}
And then, we use JavaScript to check if the button contains the class
const btn = document.querySelector(".btn")
btn.addEventListener("click",function(){
//using a callback function to decide what we want to happen when the button is clicked
if (btn.classList.contains("btn")){
// condition
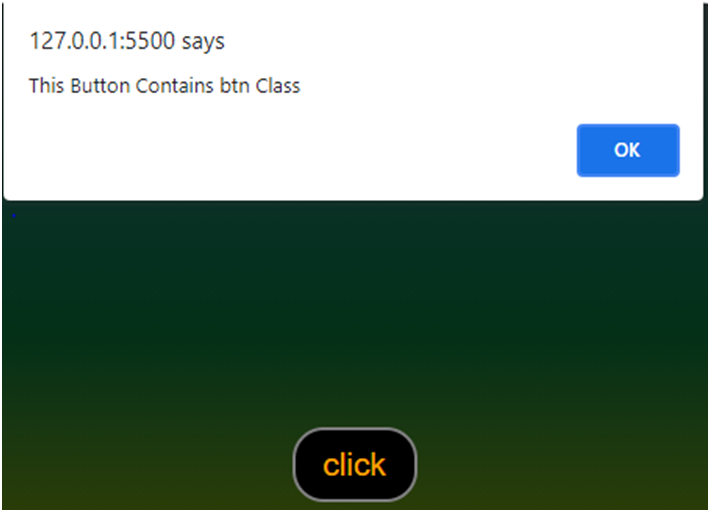
alert("This Button Contains btn Class")
}
})
So what happen here is that, we added an event listener, precisely, a click event. Next, we use a callback function which will run whenever the button is clicked. In this case, when the button is clicked, the classlist.contains method will check if the button contains the “btn” class and then execute the function otherwise it will just ignore the function.
Output
So, are we limited to just alert? NO. Let us makes this more interesting.
Remember, the class we created in CSS, we are going to add it and change the text content of the button with the code below.
JavaScript

const btn = document.querySelector(".btn")
btn.addEventListener("click",function(){
    if(btn.classList.contains("btn-new")){
        btn.classList.remove("btn-new")
        btn.textContent = "click"
    }
    else{
        btn.classList.add("btn-new")
        btn.textContent = "new class added"

    }
})
Similarly to the first example, what happen in this case is that, the classlist.contains checks if the button contains the “btn-new” class,
if it contains it, it simply removes it.
If it does not contain the “btn-new” class, then add the class and change the text content of button.
And as earlier stated, once you use the contains method to check if an element contains a class or not, what you can do is endless, not just alert or changing text content.
Javascript Classlist: Toggle
The classlist.toggle works similarly to the classlist.contains. the only difference is that, the classlist.toggle only add and remove class from the selected element. And just to show how it works, lets use the same html and css.
HTML
<button class="btn">click</button>

CSS

.btn-new {
  padding: 15px;
  width: fit-content;
  color: white;
  font-weight: 900;
  background: green;
  text-transform: uppercase;
  border: 5px solid orange;
}

JavaScript

const btn = document.querySelector(".btn")
btn.addEventListener("click",function(){
          btn.classList.toggle("btn-new")
})
Code Explanation
The toggle method is used mostly with buttons, so what happen is that whenever the button is clicked,
- If the the selected element contains the class been toggled, it will remove the the class
- If the selected element does not contain the class been toggled, it will add the class.
And that is the toggle code to add and remove class contained in an element.
The main point is how we can add and remove Css class in JavaScript. Although both the classist.contains and classlist.toggle can be used to achieve the same result, they are a bit different. Hopefully you get the point.